
Google Forms is a part of Google Drive, so be sure to check out our Google Drive Overview!
An oft-overlooked part of Google Drive, Forms is a simple but powerful tool which can easily fill a number of needs in your business. As with the other tools available in Google Drive, it is totally free, and you can easily collaborate with other people. In this tutorial, we'll walk you through how to set up a survey for your customers. This is a good way to collect a lot of useful data, for example, how your customer heard about you, or what products they are most likely to use or tell their friends about.
The Situation
Imagine, if you will, that we are a small event planning company who have recently run a number of events for one of our clients. We are hoping to get some feedback on how these events were accepted by the attendees, in order to improve future events.
Getting Started
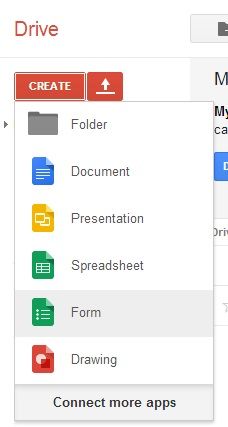
Go to drive.google.com to access your Google Drive. If you are not logged into your Google account, you will need to do so here. Once logged in and on your main screen, you will want to click the big red "CREATE" button on the left sidebar and select "Form" from the list.
(If you're interested in the other options here, be sure to check out our other resource articles about Google Drive coming soon!)
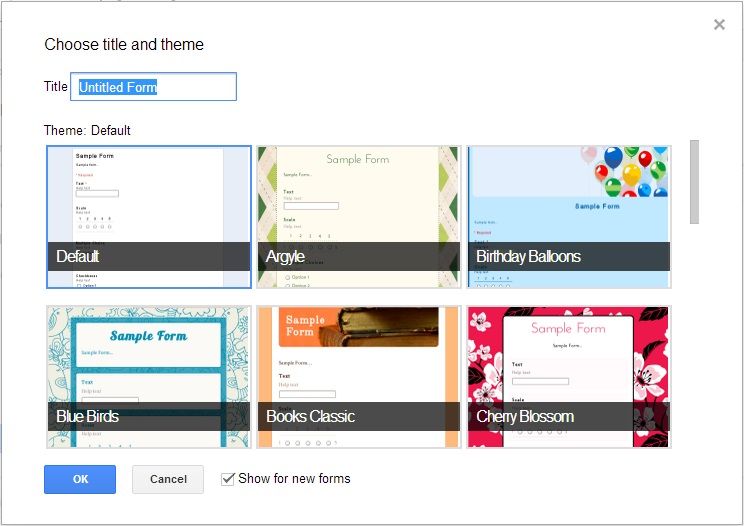
After you've opened up the form, you will happen upon a screen where you get to name your form and choose a theme for the form. I like the color and look of the "Books" there, so we'll go ahead and choose that one. I also like to believe that the events were run in a library multipurpose room.
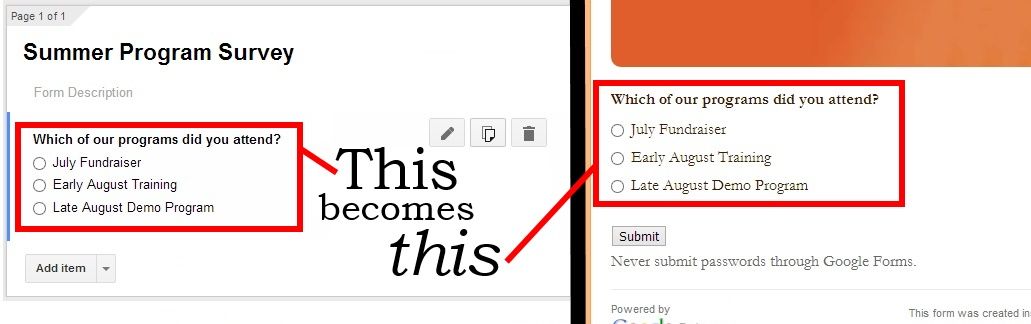
We'll name the form "Summer Program Survey," as it's going to be a summary of the source of our clients from various programs we've run over the summer. Our first question will simply be a question on where the form-filler had heard of our company. We simply choose this to be a multiple choice question, fill in the question, and provide some possible answers.
One nice feature you can use here is that it is possible to send your users to different pages based on their choices (just like a choose-your-own-adventure book). In this survey we will have the user fill out a form that relates to the program which they indicated that they attended. This ability to customize the information you acquire is invaluable. This can prevent you asking your customers questions which are inapplicable to them, which in turn helps to ensure that you will have a higher completion percentage on forms.
Be sure not to ask your users too many questions! Users are far more likely to finish a form with fewer than 5 pages. Keep it short and sweet.
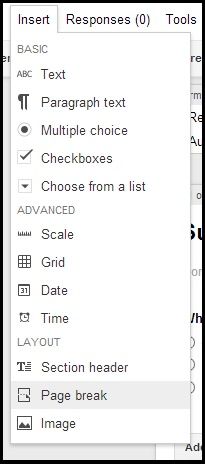
In order to add additional pages to your form, simply choose "Page Break" from the "Insert" dropdown menu. You can add anything from this page. Here is a breakdown of each option:
Text A question or prompt where the answer space is a small box to enter text. Good for questions where the answer is a word or two, or perhaps an ID number.
Paragraph Text Good for open-ended, long-response style questions. Let your users express their opinions here
Multiple choice Multiple choice selection (just like the SAT!), where the user can select only one option
Checkboxes Multiple choice, but in this case the user can select one or more of the options
Choose from a list Functionally similar to Multiple choice, but uses a dropdown menu.
Scale Allows your users to rank something on a scale you define. If you are ranking a large number of items/criteria, you should use Grid.
Grid Essentially just a number of scales. Good for ranking a number of items or criteria.
Date Your user chooses a date from Month, Day, and Year dropdown menus
Time Either a specific time of day or a duration is chosen from dropdown menus.
Section header A header that allows you to break up sections of your form
Page break Lets you make a totally separate page of your form.
Image Insert an image, good for beautification of the form.
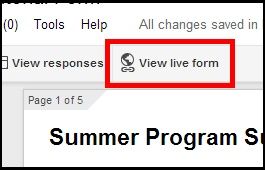
After you finish creating your form, made even easier by the fact that nearly everything is drag-and-drop, you'll want to publish your form. Simply click "View Live Form" on the top. Now just copy the URL from this page (that's the address in the address bar). It is mostly a bunch of gibberish, so you'll want to send that address in an email or a posting to your potential respondents.
For your reference, here is our sample Google Form used in this tutorial.
Getting Data
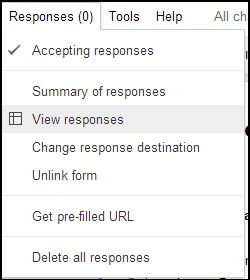
You've sent out the link to everyone, and you want to see what sort of responses are coming in. On the "Responses" dropdown menu, there are a couple options. Summary of responses is a statistical view, which should allow you to get a nice breakdown of the data received through your form. View responses is an option that will let you view your responses in spreadsheet format. This may be useful if you want to import the info into some other system (or save it onto your computer as an excel file.
Once your period of accepting responses is over, be sure to uncheck the option "Accepting responses" so that you don't get any new responses there. You don't want new data throwing off your results!
Now you have the know-how to get your own Google Forms created! Just go to drive.google.com and get cracking. Get creative, have fun, and be sure to let us know how your company uses Google Forms on our Facebook page. Sign up for our newsletter to get more articles on Google Drive and other online apps for your small business!
Sign up to receive updates in your inbox