
You've chosen and bought a domain name, and you've registered Google Apps. Now it's time to get your email running through Google Apps. Considering how vital email is to your business (when was the last time you didn't send an email in the day?), you've gotta get this set up! And that's why we're here to help you.
MX Records (not to be confused with the Mail Exchange in Melbourne)

One of the first things you'll need to do is to configure your "Mail Exchange" (or MX for short, because MX sounds cooler than ME) records. As described by Google, "MX records are DNS settings associated with your domain that direct its mail to the servers hosting your users' mail accounts."
Say what?
Basically what this means is that the MX records are sign posts for your mail. The mail arrives at your domain host (the folks who hold your domain name), checks the MX records, and then knows where its correct destination is. So it actually isn't that different than a giant mail sorting building!
Configuring your MX records
Google has a huge list of different domain hosts' instructions on the left sidebar of this page, so you should be able to find yours on that list. If you don't know who your host is, you can find out here.
We'll be explaining how to set this up using a domain you have bought through Namecheap.com. Be sure to check out our guide on how to buy a domain name if you haven't done so yet! If you aren't using Namecheap, the terminology may be a bit different, though the process is essentially the same.
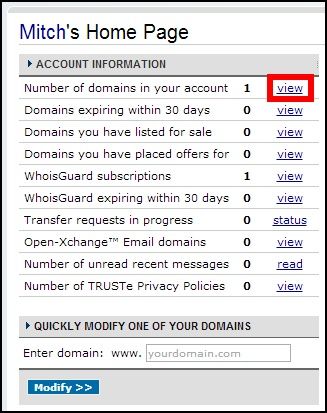
Your MX records are going to be found in your administration tools. So go to Namecheap.com and log in to your account. You should see a menu listing the number of domains which you have on the account: click "View" on "Number of domains in your account."
This will show you a list of the domain names which you own. If you only have the one domain, then your choice is simple. Otherwise, just choose the domain which you want to set your email up for here.
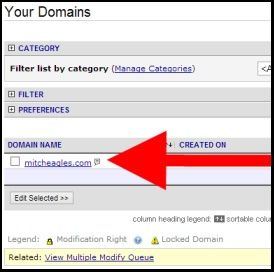

This should bring you to the page where you manage this domain. The left sidebar probably has a wide range of options, but the one we're looking for should read "All Host Records."
This page is exactly what we're looking for. As you can see below, it actually has the option to automatically set the email hosting with Google Apps.
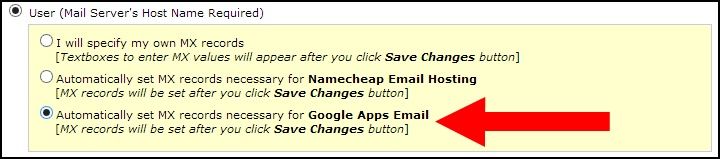
After you choose this and click the "Save Changes" button at the bottom of the page, some new settings should come up. The should look look like those shown below, so adjust them if they come up strangely for some reason.
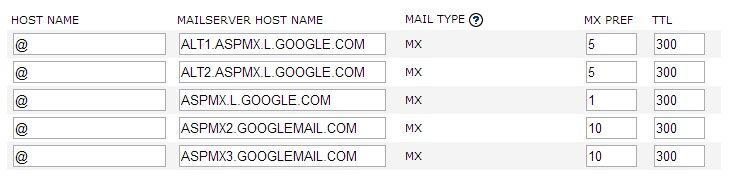
By the way, TTL, or "time to live" is the amount of time it how often the mail server is checked for new settings or emails. So since it is 300 (seconds) here, your mail will be checked for every 5 minutes (300 seconds). You can modify this if you want.
You're all done! That should be everything! Send some test emails, and see if they show up. If you have any questions about this guide, just let us know.
Sign up to receive updates in your inbox