
So, you've decided on the name of your business. The next step is to transfer this name into a domain name and to get your own website. A great tool for this is InstantDomainSearch.com. Show below, you can simply type names, and you will get their availability and pricing immediately! Additionally, the site will give you recommendations of other possible domain names.
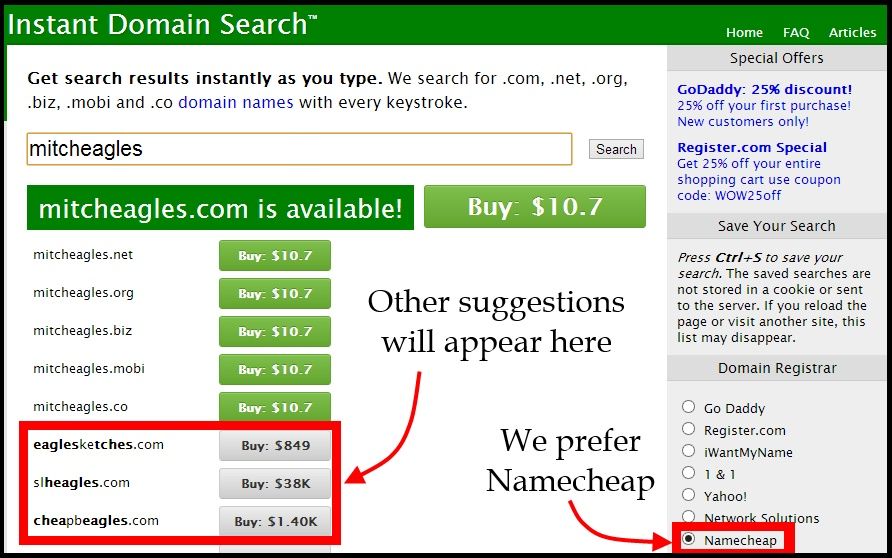
Once you've decided on a name, then simply choose your domain registrar. This is the company you will buy the domain from. While GoDaddy is the default, and often the cheapest choice, we recommend (and will use in this tutorial) Namecheap.com. As outlined in one of our previous blog posts, Namecheap has great reviews from those in the know.
Getting the Name. Cheap.
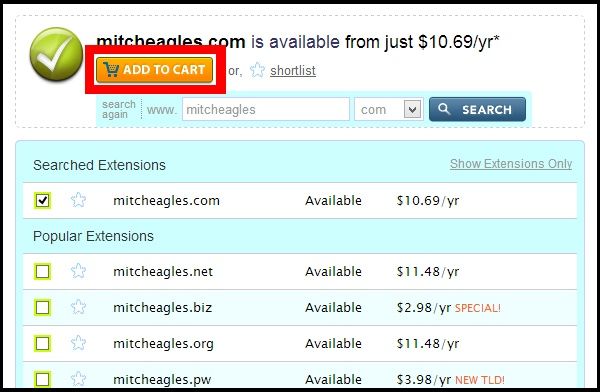
Once we've selected Namecheap and a domain name that is open, we simply click on the big green "Buy" button and are taken to Namecheap's website. Here on Namecheap's page, you should see that your domain is available for the same price mentioned on InstantDomainSearch.
You can continue doing searches here, if you'd like. If you're all set and ready to go through with buying the domain, then all you have to do is click the "Add to Cart" button here in order to move on. If you wish to buy additional extensions (such as .net, .org, .biz, or such), you can click their checkboxes here to add them to your cart.
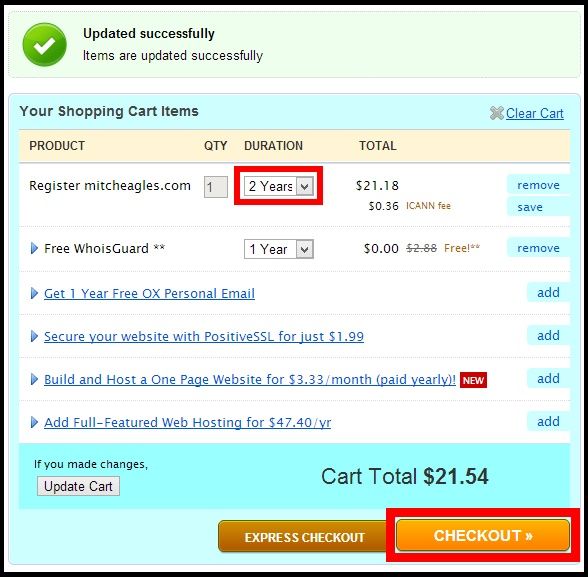
This next page will allow you to choose the length of your subscription, as well as a couple other options. I chose to make my subscription for two years. You can choose however long you would prefer. I just don't want to have to deal with it immediately after the year is over.
You also have the option to add something called "WhoisGuard" to your order, which adds a layer of anonymity to your website, if you prefer that. Every website must have the administrator's contact information (retrievable by a protocol known as a Whois), and this option assigns that contact info to a service, so that your personal contact info isn't simply available on the web for anyone to access. Namecheap usually offers a free year of WhoisGuard free, so I figure I might as well grab it. We can always cancel it later.
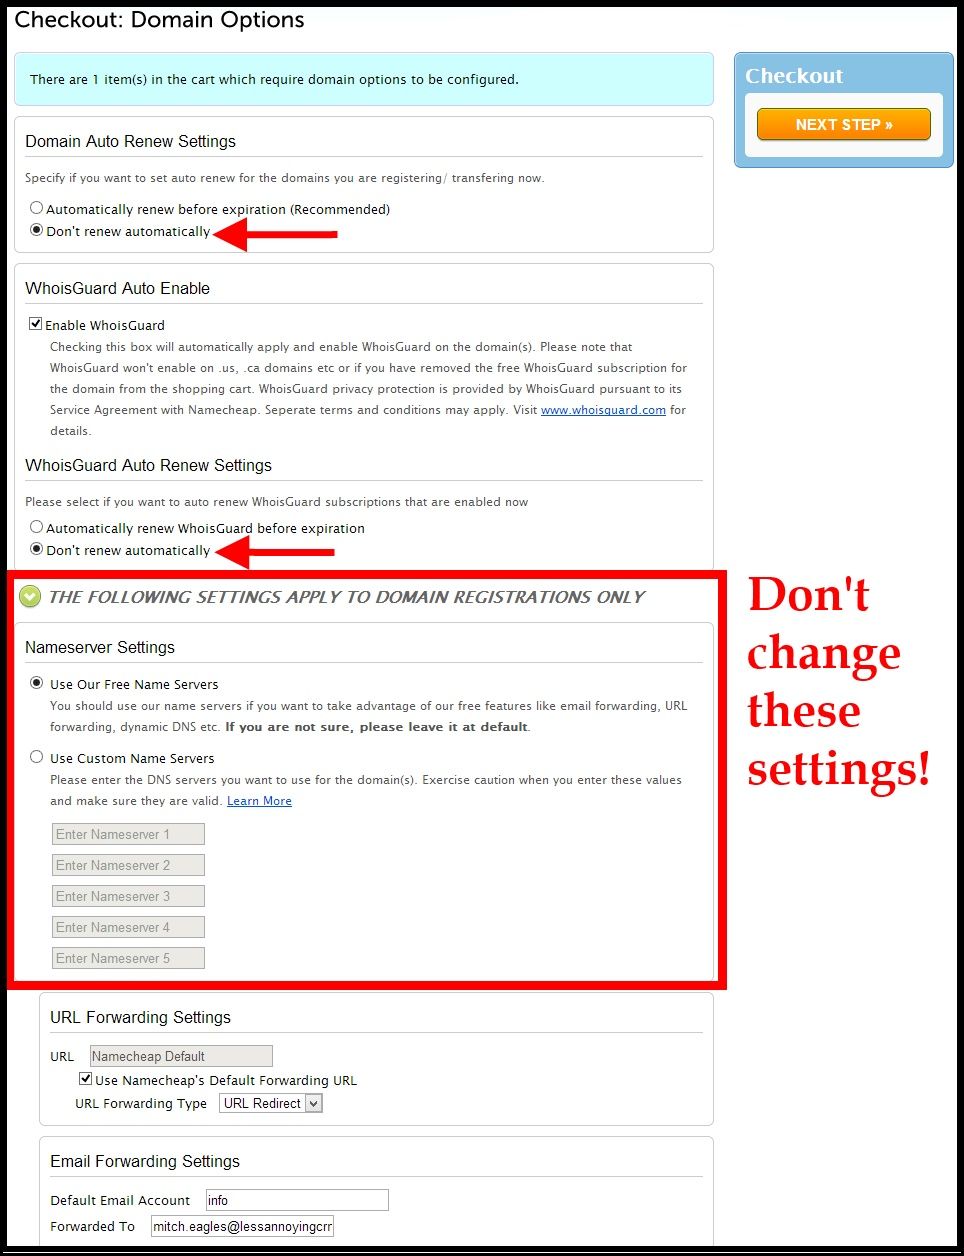
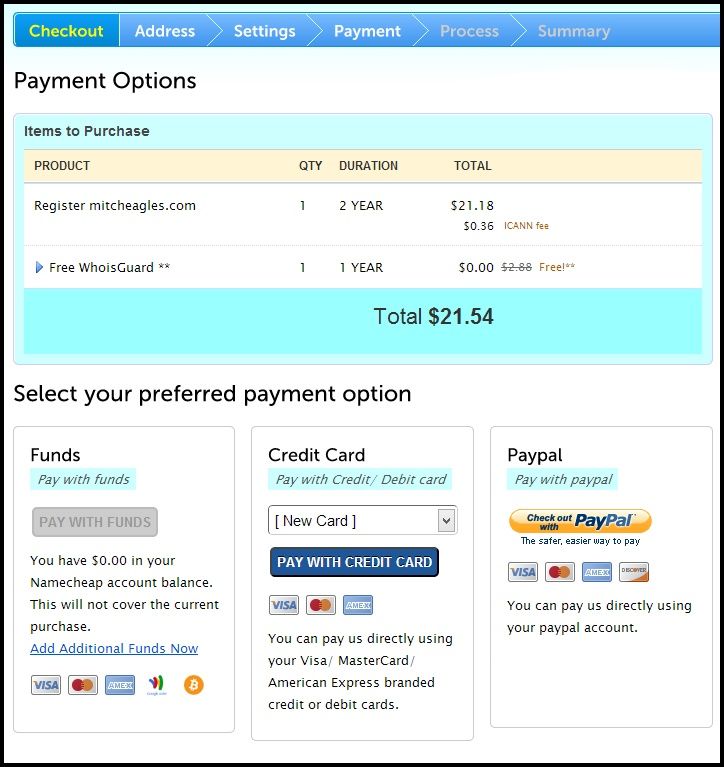
Checkout: Domain Options
The next page we are shown has a number of options, so we'll go through each one. The first two are pretty self-explanatory. If you want your ownership of your domain to renew when it is almost expired, then allow auto-renew. Similarly for the renewal of WhoisGuard. I'll turn off the renewal, because I want to be able to reevaluate as they approach expiration.
The next group of options has your nameserver settings. Unless you know what you're doing with these, don't mess with them. If you change these around incorrectly, nobody will be able to access your site, and that would be a bummer.
If you already have another page you want to direct to, then you will want to take a look at the URL Forwarding option. Anyone going to the domain which you are buying will be automatically redirected to the address you put in this field (if you put one at all).
Finally, Email Forwarding is an important option to look to. This will create an email address for this domain name which will forward to your personal email inbox. The default forwarding address is info@YOURDOMAIN.com, although you can change "info" to anything you want. Be sure that the "Forwarded To" box has a valid email address.
With this option you will look quite tech-savvy, as you will have your own personalized email address!
Once you've finished looking over these options, click "Next Step" to move on.
The Final $tep
Of course, nothing in this world is free. On this page we'll have to pay for our domain. Look over the prices and make sure that you're paying for what you wanted. After that, simply choose your payment method and put in your payment info.
Tah-dah! You now own your own little piece of digital real estate.
If you use Google Apps for Business, be sure to check out how to set up your mail exchange with your domain, so that you can receive email through that system.
You're all set! Keep your eyes out for more articles on getting your website up and running, and subscribe to our newsletter to be the first to know about our new resource articles.
Sign up to receive updates in your inbox